

The cost of new clothing continues to grow year by year, both environmentally and monetarily. With rising cost and the speed of new trends, it becomes hard to keep up. Enter thrift flipping.
Thrift flipping is not new, but it has been gaining popularity as more people search for authenticity and personalization. Also referred to as upcycling or DIY-ing, thrift flipping is the process of taking old clothes — either from your closet, or the thrift store — and turning them into to new pieces.
Thrift flipping can sometimes be associated with reselling but it doesn’t have to be! Depending on your closet, you might not even have to spend a dollar flipping your clothes. There’s no pressure to make stuff to sell either.
With that out of the way, want to upcycle something but don’t know what to make? You’ve come to the right place! I’ve gathered 7 of my favorite thrift flips all varying in difficulty. So let’s check out these gen z inspired thrift flips.
I’ve provided a difficulty rating (easy, medium or hard), the materials you will need, the general steps or a suggested video tutorial, and any extra tips that I thought would be helpful.
As the upcycles get harder, most of the instructions will be shown through video tutorials from experienced content creators. So if you are looking for a challenge, get ready for some video learning along with a few written tips to help you on your way.
1. Cutting necklines
Difficulty: Easy
Things You Will Need: T-Shirt, scissors, sewing machine (optional)

Step 1: Trace around the collar for your neckline.
To make the neckline wider, simply trace slightly outside of the original collar. For an off one shoulder look, trace wider around the top of the shirt but keep to shallow in depth. The off-one-shoulder look can also be accomplished by cutting a slightly asymmetrical neckline. Keep in mind to not cut the collar too wide. The shirt collar still needs to be narrow enough to fit on a shoulder.
Step 2: Cut around trace marks.
If you want to up the difficulty and also make a fitted top, check out this video by @i_thriftflip on YouTube. The video takes you through the process of cutting you neckline and re-fitting the t-shirt into something more form fitting.
2. Jorts cropping
Difficulty: Easy
Things You Will Need: Jeans, scissors, chalk or something it mark with.
Step 1: Try on the pants and mark the desired length to crop.
Step 2: Cut along the marked line.
(Optional): Roll up the bottom of shorts and sew or connect them with fabric glue to create a hem.
Remember when cropping any article of clothing, make sure to try it on while marking your desired length. This helps make sure you don’t cut it too short, and that it fits the way you want on your body.
3. Bleaching jeans
Difficulty: Easy
Things You Will Need: Jeans, brushes, containers, bleach, gloves, facemasks, stencils (optional).
Step 1: Lay out pants and containers with bleach.
(If using a stencil): lay the stencil in desired place.
Step 2: Apply bleach using brushes and let bleach sit for at least and hour (possibly longer).
Step 3: Wash bleach off the jeans.
Make sure to be extra careful when using bleach. Remember to use gloves and a facemask while handling bleach and be careful of bleach bleeding through the fabric. It’s best to do this upcycle outside. For best results, I recommend using black or darker wash denim.
4. Customizing ties
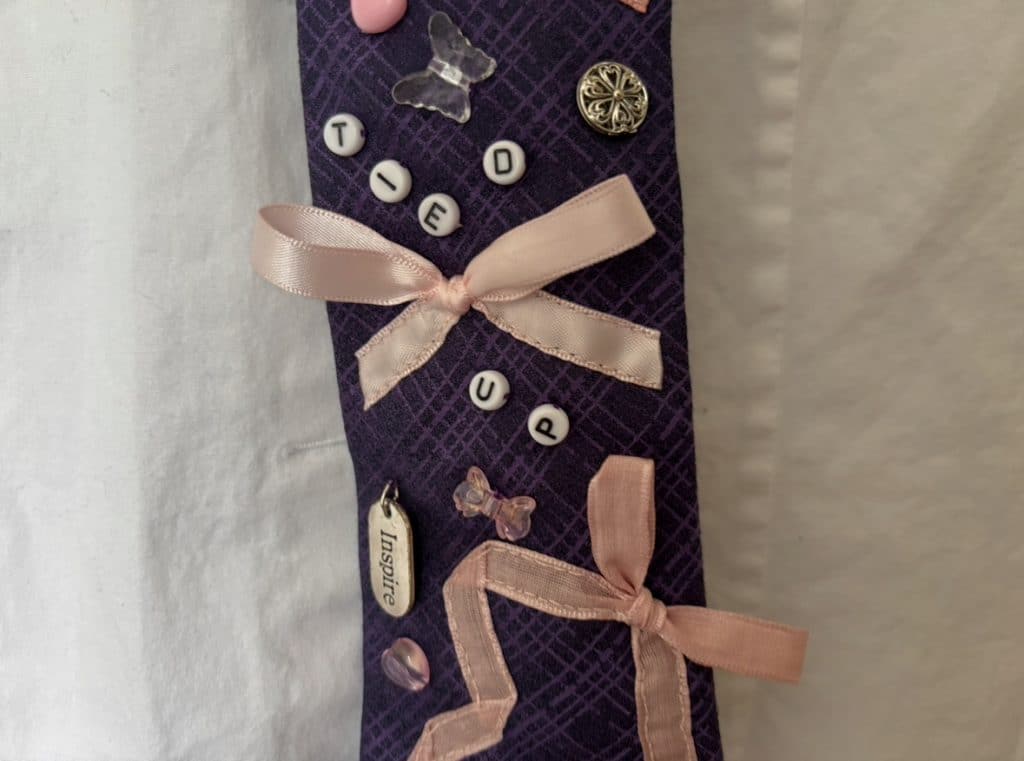
Difficulty: Easy – Medium
Things You Will Need: Tie, ribbon, beads, scissors, needle and thread.
Step 1: Set beads and ribbons where desired on the tie.
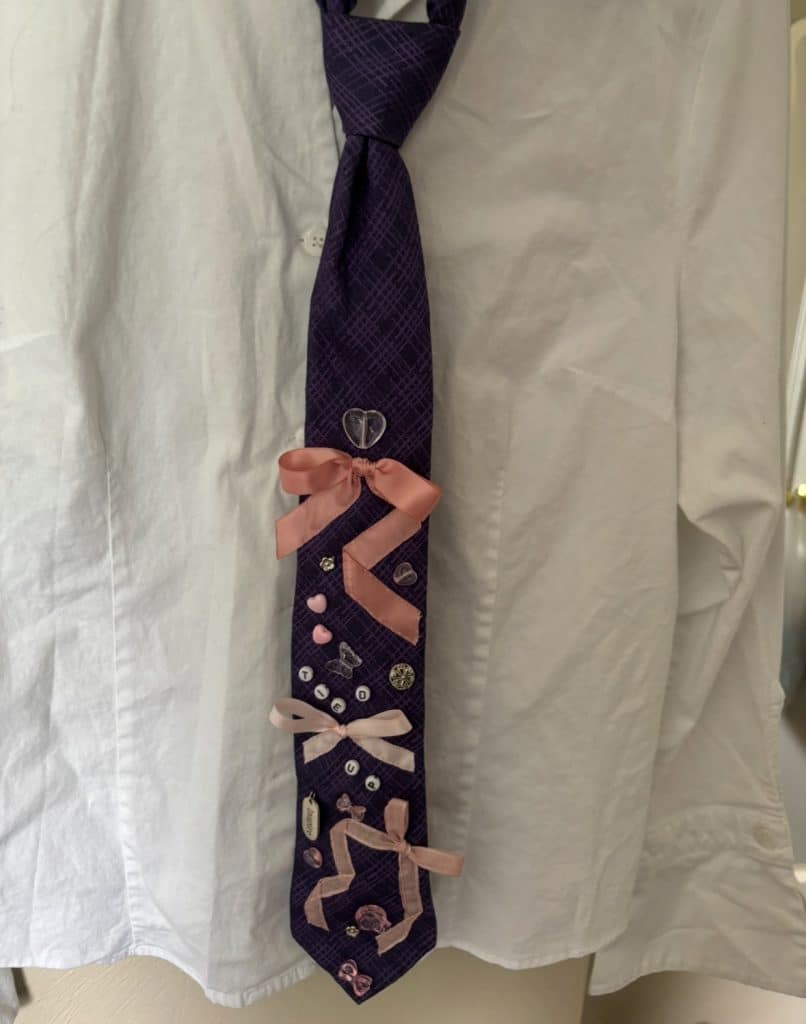
Step 2: sew beads and ribbons onto the tie.
The difficulty of this DIY all depends on your own design. Feel free to go as minimalist or maximalist as you want with the design.
5. Button-down halter top
Difficulty: Medium – Hard
Things You Will Need: Button-down top, scissors, halter top sewing pattern, elastic, sewing machine, pen or fabric chalk.
For this thrift flip you are going to take a button down t-shirt and turn it into a halter top using a sew pattern. This flip has a lot of working parts that you will need to sew together to make the top. Depending on which sewing pattern you use, there are opportunities to it make your own. For example, there are many different backs you can make either by making ties or sewing a strap.
As there are many different sewing patterns out there and written steps can get pretty generic, here’s detailed video tutorial on how to make a button up halter top made by @littlepippeth on Tiktok, where she also sells her own sewing patterns.
While watching this video, here are some things to keep in mind. If the pattern you are using doesn’t include seam allowance, make sure to add the space yourself. If you are adjusting an existing pattern, like @littlepippeth does, make sure adjustments are symmetrical and are the length do desire. When marking on fabric, It is recommended to use chalk or something non-permanent so that it can come off in the wash.
6. Sweatpants mini skirt
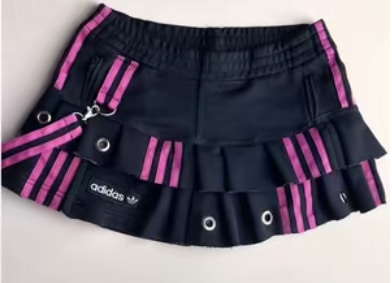
Difficulty: Medium – Hard
Things You Will Need: Activewear pants, scissors, sewing machine/needle and thread.
In this thrift flip, you’ll be turning a pair of athletic pants into a stylish new miniskirt. This process will require you to cut a base using the top of your pants, then sew on strips from the pant legs to create the skirt layer(s). Once done creating the general skirt you can then customize your design using excess fabric or other materials you have at your disposal.
To get a better picture, we’re going to follow thrift-expert @i_thriftflip.
From experience, it is possible to make this skirt without a sewing machine. But it does take a lot more time and patience. For those wanting to attempt this without a sewing machine, I have a few tips.
Firstly, when hand sewing, make sure to mark and pin everything before you start sewing. As someone who likes to wing everything and just start, this is not the best DIY for that. For this process, you are going to want to mark the desired level of the pleats with the base on. Next, pin the pleats onto the skirt and re-try it on to ensure everything is where you want it to be. Then sew the pleats on using a back stitch.
7. Maxi skirt to mini dress
Difficulty: Hard
Things You Will Need: Maxi skirt, scissors, dress sewing pattern, dress form
This flip gets difficult as you will have to fully take apart the maxi skirt and reconstruct it using a sewing pattern. If the skirt has an inner liner, it will have to be separated and added back on later during sewing to have the liner in the dress as well. After following the pattern you choose you should end up with a cute mini dress of your own!
That being said, we’re going to follow @transformationsbttracy while I list some tips and tricks to get a better hang on what she’s doing.
Remember that this thrift flip can work with many different dress patterns. Just make sure that you have enough fabric to work with depending on the dress pattern you are using. Although this thrift-flip is challenging there are many opportunities for customization. Even Tracy says that she “especially loves the heart detail in the back closure.” That said, don’t be afraid to add an extra piece to your design, it might just become your favorite piece.
Looking for more?
Need more inspiration? Check out these content creators: @i_thriftflip, @littlepippeth, and @transformationsbytracy. These three creators often create thrift flipping content and tutorials for their creations. If you need a new project to do but don’t know where to start? Go check out their stuff!
I hope some of these thrift flip ideas have inspired you to try one of your own. And lastly, remember that customizing your clothing is all about making it your own. Don’t be afraid to experiment and stray from the typical tutorial. Remember to be yourself, have fun and happy flipping!